
In the realm of culinary arts,gluten-free baking has long been cast as a niche pursuit-often synonymous with compromise rather than creativity. Yet, beneath the surface of almond flours and xanthan gums lies a vibrant world where flavor, texture, and artistry converge. Mastering Gourmet Gluten-Free Baking: Tips & Tastes Unveiled invites you to transcend the ordinary boundaries of gluten-free cooking and discover how to transform simple,allergen-kind ingredients into extraordinary baked delights. Whether your a seasoned pro or a curious novice, this journey will equip you with expert techniques, insider secrets, and inspiring flavor combinations that prove gluten-free can be gourmet, indulgent, and utterly unforgettable.
Understanding Gluten-Free Flours and Their Unique Properties
Mastering gourmet gluten-free baking starts with a thorough grasp of the diverse flours that define this culinary craft. Unlike conventional wheat flours, gluten-free options each boast distinct textures, flavors, and baking behaviors. For instance, almond flour offers a rich, buttery note and lends moisture, ideal for tender cakes and cookies. Brown rice flour brings a mild, nutty taste and a slightly gritty texture, providing structure to breads and muffins. Tapioca starch acts as a superb binder, delivering the chewiness and elasticity frequently enough missing in gluten-free doughs. Meanwhile,cassava flour mimics wheat’s versatility but with a lighter,subtly sweet profile.
These flours rarely perform in isolation; blending them balances their properties. For example,a mixture of oat flour and potato starch can help replicate the crumb of traditional baked goods by marrying density and moisture retention.Sensitive to hydration levels, gluten-free doughs usually require tailored liquids and binding agents like xanthan gum or psyllium husk to achieve the ideal texture.
Crafting the Perfect Dough: Essential Techniques for Texture and Flavor
When mastering gourmet gluten-free baking,dough planning demands precision and patience. Begin by weighing your flours to ensure accuracy, as differences in flours’ absorbency affect hydration profoundly. Hydrating the dough gently but fully is key-allowing the flours to soak for 10-15 minutes before working it improves texture and helps flavors meld.
Use gentle mixing techniques-overworking can dry out gluten-free doughs, while under-mixing leaves pockets of dryness. Resting the dough post-mixing is another crucial step; it encourages starches and flours to bind fully, resulting in more cohesive, pliable doughs that handle better during shaping and baking.
Temperature control also influences success. Such as, working with cooler ingredients and chilling dough before baking helps preserve the rise and creates a tender crumb, especially in swift breads and pastries. When kneading or folding, use light motions to incorporate air without breaking down the delicate structure.
Enhancing Taste Through Natural Ingredients and Creative Flavor Pairings
Transforming gluten-free baked treats into extraordinary delights involves thoughtful additions beyond the basic flours. Incorporate natural sources of sweetness like maple syrup, honey, or fresh fruit purées to deepen flavor complexity. Spices such as cinnamon, cardamom, or freshly grated nutmeg add warmth and aroma without overpowering delicate crumb notes.
Experiment with uniquely complementary flavors: toasted coconut flakes enhance texture and nuttiness, while citrus zest brightens and lifts denser preparations. Nut butters like almond or cashew can enhance moistness and add a silky mouthfeel,merging beautifully with chocolate or roasted berry composites.
Don’t underestimate herbs and floral infusions. A hint of rosemary or lavender can introduce unexpected freshness, while natural extracts-vanilla, almond, or citrus-amplify flavor without extra sweetness.
Expert Tips for Baking Success and Troubleshooting Common Challenges
Success in gluten-free baking comes from combining perseverance with smart strategies. Always preheat your oven fully and use accurate thermometer checks to avoid under- or overbaking.If your baked goods turn out crumbly or dry, try increasing moisture slightly by adding an extra tablespoon of oil, applesauce, or yogurt. Conversely, sinking or gummy textures usually signal over-hydration or insufficient leavening-adding another egg or a touch more baking powder can help.
If you notice dry, cracked edges, covering the dough or batter with foil midway can retain moisture, while a pan of hot water nearby boosts oven humidity. For breads, scoring dough and using steam promotes an appealing crust and better expansion.
Investing in quality, fresh gluten-free flour blends and regularly testing batches lead to continual betterment. For an extra edge, refer to the Celiac Disease Foundation’s baking resources for advanced flour mix recommendations and allergy-conscious ingredient swaps.
Prep and Cook Time
- Preparation: 20 minutes
- Resting time: 15 minutes
- Baking time: 30-40 minutes (varies by recipe)
Yield
makes approximately 12 servings
Difficulty level
Medium - perfect for experienced home bakers eager to refine technique
Ingredients
- 1 cup almond flour, finely ground
- 1/2 cup brown rice flour
- 1/4 cup tapioca starch
- 1 tablespoon psyllium husk powder
- 1 teaspoon baking powder, gluten-free
- 1/4 teaspoon salt
- 2 large eggs, room temperature
- 1/4 cup maple syrup
- 1/3 cup coconut oil, melted
- 1 teaspoon pure vanilla extract
- 1/2 cup unsweetened almond milk
Instructions
- Preheat your oven to 350°F (175°C). Line a 9×5-inch loaf pan with parchment paper or lightly grease it.
- In a large bowl, whisk together almond flour, brown rice flour, tapioca starch, psyllium husk powder, baking powder, and salt.
- In a separate bowl, beat eggs, maple syrup, melted coconut oil, vanilla extract, and almond milk until fully combined and smooth.
- Pour wet ingredients into the dry mix. Using a spatula, gently fold until a thick batter forms. Avoid overmixing to keep the texture tender.
- Let the batter rest for 15 minutes to hydrate the flours and thicken.
- Transfer batter carefully into the prepared pan, smoothing the top evenly.
- Bake for 30-40 minutes until golden brown and a toothpick inserted in the center comes out clean.
- Cool in pan for 10 minutes before transferring to a wire rack to cool completely to avoid gummy crumb.
Chef’s Notes
- Substitute coconut oil with avocado or olive oil for different flavor nuances.
- For a nut-free version, replace almond flour with a sunflower seed flour blend, adjusting liquids as needed.
- If batter feels too thick, add almond milk one teaspoon at a time until reaching spreadable consistency.
- Make-ahead tip: Fully baked loaves freeze well for up to 3 months. Thaw at room temperature and warm slightly before serving.
- To enhance rise, try adding a teaspoon of apple cider vinegar or lemon juice to activate baking soda in other recipes.
serving Suggestions
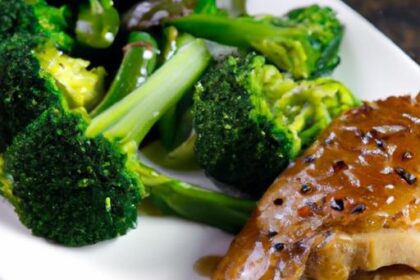
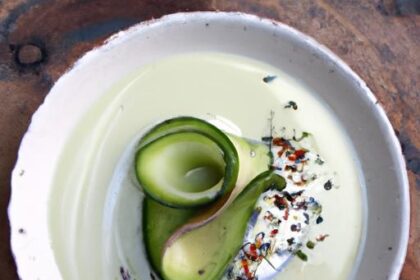
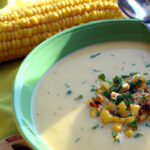
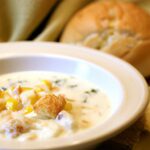
Enjoy slices warm, slathered with whipped coconut cream or a drizzle of raw honey.Garnish with fresh berries,toasted nuts,or a sprinkle of cinnamon for an inviting presentation. This versatile bread also shines as a base for savory toppings like avocado mash and roasted tomatoes or breakfast spreads with almond butter and banana slices.

| Nutrient | Per Serving |
|---|---|
| Calories | 180 kcal |
| Protein | 5 g |
| Carbohydrates | 15 g |
| Fat | 12 g |
For further inspiration, explore our comprehensive guide on gluten-free flour blends, complementing your journey to mastering gourmet gluten-free baking.
Q&A
Q&A: Mastering Gourmet Gluten-Free Baking: Tips & Tastes Unveiled
Q1: Why is gluten-free baking frequently enough seen as challenging compared to traditional baking?
A1: Gluten is the protein that provides elasticity and structure in baked goods, giving them that perfect chew and rise. without gluten, achieving the same texture and cohesive crumb can be tricky. Gluten-free baking requires a thoughtful blend of alternative flours,binders,and techniques to replicate those classic qualities while enhancing natural flavors.
Q2: What are some essential gluten-free flours for creating gourmet baked delights?
A2: There’s a delicious spectrum to explore! Almond flour lends moistness and a subtle nuttiness, coconut flour offers fiber and a touch of sweetness, and brown rice flour brings a mild, neutral base perfect for delicate cakes.Teff and sorghum flours can add fascinating depth and character. Blending these flours unlocks complex textures and nuanced tastes.
Q3: How do binders work in gluten-free baking, and which ones do you recommend?
A3: Binders act as the ‘glue’ that holds your baked goods together, mimicking gluten’s role. Common binders include xanthan gum, guar gum, and psyllium husk powder.Each brings unique properties: xanthan gum is great for airy breads,psyllium husk creates a chewy crumb ideal for rustic loaves,and guar gum lends softness to cakes and muffins. Experimentation helps find your perfect pairing.
Q4: Can you share a tip for achieving moisture and tenderness in gluten-free cakes?
A4: Absolutely! Incorporate ingredients that naturally enhance moisture-think applesauce, mashed bananas, or yogurt alternatives like coconut yogurt. Additionally, adding a touch of fat, such as olive oil or avocado oil, will infuse crumb softness. Remember, gluten-free flours often absorb more liquid, so balancing hydration is the secret sauce.
Q5: How critically important is resting time for gluten-free doughs and batters?
A5: Resting is a game changer! Allowing your batter or dough to sit for 20-30 minutes lets alternative flours fully hydrate, improving texture and structure. This pause also helps binders activate and flavors to meld,resulting in more cohesive,tasty baked goods with fewer crumbly surprises.
Q6: What are some innovative flavor infusions that shine in gluten-free baking?
A6: Think outside the vanilla box! Toasted spices like cardamom or star anise, zests of citrus fruits, and notes of lavender or rose water can elevate your creations. Incorporating chopped nuts, seeds, or dried fruits not onyl adds texture but layers of taste complexity. The gluten-free canvas welcomes creativity with open arms.
Q7: Are there gluten-free baking appliances or tools that can enhance your results?
A7: While traditional mixers and ovens work wonderfully, precision tools boost success. A digital scale ensures perfect measurements-crucial for the delicate balance gluten-free baking demands. Silicone baking mats offer non-stick surfaces without extra oils,and a good quality stand mixer can help develop batter consistency without overmixing.
Q8: How do you handle the challenge of crumbly gluten-free baked goods?
A8: Crumbliness often signals insufficient binding or moisture. To counter this, increase your binder slightly, add a splash more liquid, or incorporate an extra egg if your recipe allows. Using a blend of flours-combining starchier and protein-rich ones-also creates more elasticity. Lastly,avoid overbaking,as dry heat can turn tender cakes into sandy textures.
Q9: What’s a simple gluten-free baking project for beginners eager to dive into gourmet territory?
A9: Start with almond flour shortbread cookies! They require minimal ingredients, no complex rising agents, and offer a buttery, melt-in-your-mouth experience that feels extravagant yet forgiving. From there, you can gradually experiment with layered cakes or artisanal breads as confidence and skills flourish.
Q10: how can home bakers ensure their gluten-free creations taste as gourmet as they look?
A10: Flavor is king! Use quality ingredients-freshly ground flours, pure extracts, and whole spices. Don’t shy from layering complexity through zests,natural sweeteners like maple syrup or honey,and thoughtful textures with nuts or seeds. Presentation matters too: delicate dustings of powdered sugar, elegant fruit garnishes, or a drizzle of luscious glaze transform treats into culinary art.
With these tips and insights, your journey into gourmet gluten-free baking promises to be both adventurous and delicious. Happy baking!
Key Takeaways
As you close the chapter on these gourmet gluten-free baking secrets, remember that mastery is a journey as much about experimentation as precision. Each flour blend, every bubble of fermentation, and the alchemy of flavors you create brings you closer to a pantry filled with delights that defy expectation. With these tips unveiled, your oven becomes a stage for innovation-where texture embraces tradition and taste knows no boundaries.So, tie your apron, preheat with confidence, and let the art of gluten-free baking transform both your kitchen and your palate into a sanctuary of delicious possibility.