


There’s somthing undeniably magical about a perfectly cooked dry-aged steak-teh deep, complex flavors, the tender bite, and that rich, buttery aroma that fills the kitchen. While dry-aging has long been the secret domain of upscale steakhouses and expert butchers, mastering this art in your own home is more achievable than you might think. In this flavorful guide, we’ll unravel the mysteries of dry-aging, step into the science behind the process, and equip you with practical tips to transform a humble cut of beef into a culinary masterpiece. Prepare to embark on a savory journey that will elevate your steak game and impress even the most discerning palates.
Mastering dry-aged steak at home opens a fascinating culinary journey where science meets flavor and texture in magnificent harmony. dry aging isn’t just a process; it’s an art form that transforms robust cuts of beef into tender, deeply flavored masterpieces. By understanding the biology and chemistry behind it, you can replicate this premium steakhouse experience within your own kitchen, unlocking an intense, nutty, and buttery savor that commercial steaks often lack.
Prep and Cook Time
- Dry Aging Duration: 21 to 30 days (depending on preference)
- resting Time after Aging: 1 hour at room temperature
- Cooking Time: 10 to 15 minutes (depending on steak thickness and desired doneness)
Yield
Serves 2-3 people, depending on the steak cut size (approximately 16-20 oz after trimming).
Difficulty Level
Advanced – requires patience, attention to detail, and controlling environment conditions.
Understanding Dry Aging Science and selecting Your Cuts
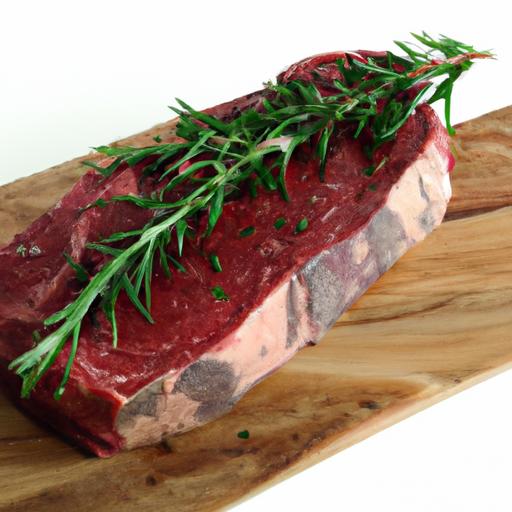
At its core, dry aging enhances flavor and tenderness through controlled enzymatic and microbial processes.The beef’s natural enzymes break down muscle fibers, while moisture loss concentrates the flavor, creating a robust umami profile layered with subtle hints of nuttiness and earthiness. To succeed,start with premium primal cuts that have good marbling,such as the ribeye,striploin,or sirloin. These cuts contain fat that shields the meat during aging and helps develop complexity in flavor and texture.
Choosing a well-marbled, bone-in cut is ideal as bones protect the interior meat and contribute to taste. When preparing for dry aging, gently trim excess fat or silver skin but leave a protective fat cap intact to prevent over-drying. Wrapping or vacuum sealing is avoided during dry aging as exposure to air is essential for the natural enzymatic reactions to take place.
Perfecting Your Home Setup for Exceptional Dry Aging
Creating the perfect environment is key: maintain a steady temperature between 34°F and 38°F (1°C to 3°C), with humidity around 80%. This delicate balance prevents spoilage while encouraging the aging process. A dedicated mini-fridge or a converted wine cooler works excellently. Equip your setup with an accurate thermometer and hygrometer for constant monitoring.
Airflow is crucial-circulating fans help keep the surface dry, limiting bacterial growth while promoting uniform aging. Place the aged beef on a wire rack over a tray to catch drips and allow air circulation on all sides. Resist opening the door frequently, as temperature fluctuations can jeopardize quality.
Ingredients
- 1 whole bone-in ribeye or striploin primal cut (about 10-15 lbs), well-marbled and preferably USDA Choice or Prime grade
- Coarse sea salt, for seasoning after aging
- Freshly ground black pepper, to taste
- High-smoke point oil (e.g., avocado or grapeseed oil), for searing
- Butter and fresh herbs (such as thyme and rosemary), for finishing
Instructions
- Prepare your workspace. Sanitize your refrigerator or aging chamber thoroughly. Set it to maintain 34°F-38°F with 80% humidity.
- Trim the primal cut. Remove any loose connective tissue and excessively thick fat, leaving a protective outer layer intact.
- Place the beef on a wire rack. Position over a shallow pan to catch any drippings,then insert it into your dry-aging setup to allow proper airflow.
- Monitor temperature and humidity daily. Adjust as necessary to maintain optimal conditions.
- Wait patiently. For 21 to 30 days, the beef will progressively lose moisture and intensify in flavor.Visible exterior mold may develop-this is normal and can be trimmed off after aging.
- After aging, trim the exterior crust. Using a sharp knife,carefully remove the hardened,dried outer layer,exposing the richly colored meat inside.
- Divide into individual steaks. cut your aged primal into desired thickness, usually 1.5 to 2 inches thick.
- Season generously. Sprinkle coarse sea salt and black pepper on both sides of the steaks just before cooking to enhance flavor and form a crust.
- bring steaks to room temperature. Let them rest on the counter for about one hour before cooking.
- Heat a heavy cast-iron skillet over high heat. Add a small amount of high-smoke point oil.
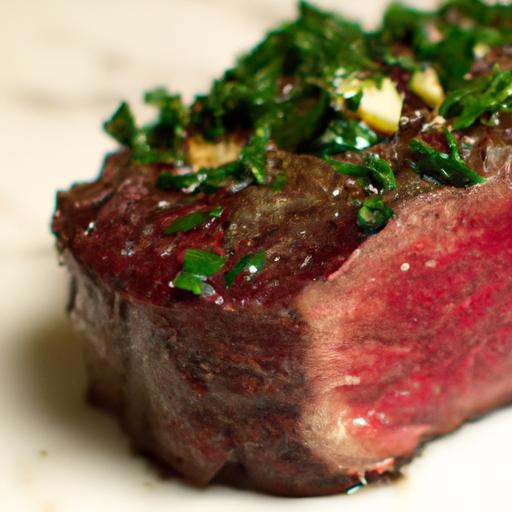
- Sear steaks. Cook 3 to 4 minutes per side or until a dark brown crust forms. For thicker cuts, finish in a preheated oven at 400°F for 5 to 8 minutes to reach your desired doneness.
- Finish with butter and herbs. Add a pat of butter and sprigs of rosemary or thyme to the pan, spooning the melted butter over the steak for an aromatic touch.
- Rest your steak. Allow to rest for 5 to 10 minutes on a cutting board to redistribute juices.
- Serve and savor! slice against the grain and enjoy the unparalleled depth of flavor only dry aging can deliver.
Tips for Success
- Patience pays off. The longer the dry aging (up to 45 days), the stronger and more unique the flavor, but texture may become firmer.
- Use a dedicated fridge. Avoid contaminating your dry-aging setup with other foods.
- Trim thoroughly. removing the dry crust layer is essential for the best eating experience.
- Experiment with aging time. Start with 21 days if you’re new to dry aging, then try longer periods based on your taste preferences.
- Don’t skip seasoning. Salt before cooking helps build a flavorful crust that complements the aged beef.
- invest in quality meat. The journey begins with prime beef-never compromise on the cut you choose.
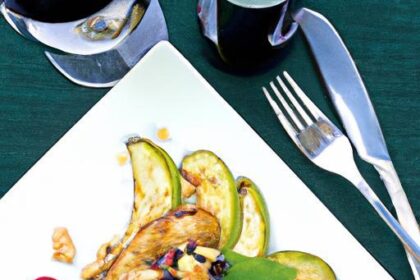
Serving Suggestions
Present your steak with a simple complement that lets the dry-aged beef shine. Think roasted garlic mashed potatoes, sautéed wild mushrooms, or grilled asparagus. Garnish with a fresh parsley sprinkle or a few sprigs of thyme for a burst of color and aroma. Pair with a robust natural jus or a simple horseradish cream to enhance the meat’s deep flavors.

| Nutrient | Per 8 oz Steak |
|---|---|
| Calories | 580 kcal |
| Protein | 55 g |
| Carbohydrates | 0 g |
| Fat | 42 g |
For further depth on beef selection and dry aging benefits, visit Beef it’s What’s For Dinner. Also, explore our article on Perfecting the Cast Iron sear for Your Steak to elevate your finishing technique.
Q&A
Q&A: Mastering dry-Aged Steak at Home – A Flavorful Guide
Q1: What exactly is dry-aged steak, and why is it so coveted among steak lovers?
A1: Dry-aged steak is beef that has been hung in a temperature- and humidity-controlled environment for several weeks. This process allows natural enzymes to break down muscle fibers, concentrating the meat’s flavor and tenderizing it. The result? A deeply savory, nutty, and beefy steak with an irresistible texture that turns an ordinary cut into a culinary masterpiece.
Q2: Can I dry-age steak at home without professional equipment?
A2: Absolutely! while commercial dry-aging rooms offer precise conditions, you can mimic the process at home with a dedicated fridge, a small fan, and careful attention to temperature (ideally around 34-38°F) and humidity (around 80%). Selecting a large, well-marbled primal cut and wrapping it loosely in cheesecloth helps the aging process while protecting the meat. Patience and vigilance are your best allies here.
Q3: how long should I dry-age my steak for optimal flavor at home?
A3: For beginners, starting with 14 to 21 days strikes a delightful balance between enhanced flavor and manageable risk. Beyond three weeks,the flavor becomes more intense and may develop funkier notes that appeal to aficionados but might intimidate newcomers. Remember, the dry-aging window depends on your taste preference and your comfort with home conditions.
Q4: Which cuts of beef are best suited for dry-aging at home?
A4: Look for large, bone-in prime cuts like ribeye or strip loin with generous marbling. These cuts retain moisture well and develop epic flavor depth during aging. Avoid thin cuts or those with minimal fat as they tend to dry out quickly and won’t age gracefully.
Q5: How do I prepare the dry-aged steak for cooking once the aging process is complete?
A5: After aging,the outer layer of the steak becomes hard and crusty – this is perfectly normal and must be trimmed off before cooking. Use a sharp knife to remove the dried exterior, exposing the tender, deep-colored meat beneath. After trimming,season simply with salt and pepper to let the dry-aged flavor shine.Q6: What cooking methods best showcase the unique characteristics of dry-aged steak?
A6: High-heat, quick-searing methods such as cast-iron skillet searing or grilling are ideal to create a flavorful crust without overcooking the tender interior. because dry-aged steaks have lost some moisture, they cook faster – pay close attention to internal temperature, aiming for medium-rare to medium for optimal juiciness and flavor.Q7: Is dry-aging a safe process to do at home?
A7: When done correctly with strict temperature and humidity control, dry-aging is safe. Hygiene is paramount: clean your fridge thoroughly before use, monitor conditions daily to avoid spoilage, and discard any meat that smells sour or off.Start small to build confidence with the process.
Q8: Can dry-aging be applied to other types of meat?
A8: While dry-aging is most famous for beef due to its muscle structure and fat content, other large-red meats like venison or game can also benefit, though they require specialized expertise. Chicken,fish,and other lean proteins do not dry-age well because they spoil quickly and lack the fat needed for flavor development.Q9: How does dry-aged steak differ from wet-aged steak?
A9: Wet-aged steak is vacuum-sealed and aged in its own juices, producing a more subtle, sometimes slightly metallic flavor with a softer texture. Dry-aged steak, conversely, is exposed to air and loses moisture during the process, intensifying its flavor and creating a firmer, more complex texture. Both have fans-dry-aging is prized for bold flavor and mouthfeel.
Q10: Any insider tips for first-time home dry-agers?
A10: Yes! Start with small batches and budget-kind cuts to hone your technique. Use a dedicated mini-fridge or cooler to avoid cross-contamination and fluctuating temps. Keep a log of temperature, humidity, and time to refine your process. Most vital: embrace the adventure of transforming beef into an umami-rich delight that’s distinctly your own creation!
In Conclusion
As the final curtain falls on your journey to mastering dry-aged steak at home, remember that patience and precision are your greatest allies. Each carefully nurtured cut holds the promise of a rich, complex symphony of flavors-transforming an ordinary meal into a culinary triumph. With the techniques and tips shared in this guide, you now hold the keys to unlocking a new realm of steak perfection right in your own kitchen. So, embrace the art of dry-aging, savor every bite, and let your taste buds celebrate the bold, unforgettable character of a steak truly worthy of your craft. Happy aging, and even happier eating!