


Imagine diving into a creamy,luscious cheesecake that requires no oven,no complicated steps,and little mess-just pure,delicious satisfaction in every bite. Welcome to the world of no-bake cheesecake jars, where convenience meets indulgence in perfectly portioned delights. Whether you’re a busy home cook craving a quick dessert fix or a party host looking to impress with minimal effort, these charming jars are your new best friend. In this article, we’ll explore easy, foolproof recipes and tips that let you whip up irresistible no-bake cheesecakes, ready to delight your taste buds and wow your guests-all without ever turning on your oven. Get ready to savor sweet simplicity in a jar!
Ingredients That Make no-Bake Cheesecake Jars Irresistibly Creamy
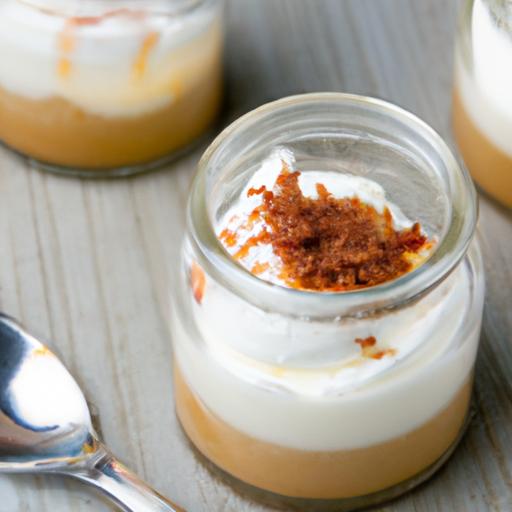
Deliciously Easy No-Bake cheesecake Jars you’ll Love start with balancing rich, smooth textures and just the right amount of sweetness.The secret lies in combining cream cheese with velvety heavy cream and fine powdered sugar, creating that melt-in-your-mouth sensation. A buttery, crumbly graham cracker crust base anchors each jar perfectly, giving every spoonful a satisfying crunch.To elevate this simple dessert, a splash of pure vanilla extract adds warmth, while citrus zest offers a subtle brightness-making these jars irresistibly creamy and refreshingly delightful.
Prep and Cook Time
- Prep Time: 20 minutes
- chill Time: 2 hours (or overnight for best results)
Yield
Difficulty Level
Easy
Ingredients
- 1 ½ cups graham cracker crumbs (finely crushed)
- 6 tablespoons unsalted butter, melted
- 1 pound (450g) cream cheese, softened
- 1 cup heavy whipping cream, cold
- ¾ cup powdered sugar, sifted
- 1 teaspoon pure vanilla extract
- 1 teaspoon lemon zest (optional for brightness)
- Fresh berries (strawberries, blueberries, or raspberries) for garnish
- Chocolate shavings or crushed nuts (optional topping)
Step-by-Step Guide to Assembling Perfectly Layered Cheesecake Jars
- Prepare the crust: In a medium bowl, combine graham cracker crumbs and melted butter. Mix until moistened and sandy.Divide evenly among 6 jars, pressing firmly to create a solid base layer.
- Whip the cream: Using a chilled bowl and electric mixer, beat the heavy whipping cream until soft peaks form. Set aside.
- Make the filling: In a separate large bowl,beat the softened cream cheese with powdered sugar and vanilla extract until smooth.Add lemon zest now if using.
- Fold gently: Incorporate the whipped cream into the cream cheese mixture using a spatula-folding carefully to preserve the airy texture.
- Assemble the jars: Spoon or pipe the creamy filling over the crust in each jar, filling nearly to the top. Smooth the surface gently.
- Chill thoroughly: Refrigerate for at least 2 hours to set; overnight chilling results in an even creamier consistency.
- Add toppings before serving: Garnish with fresh berries, chocolate shavings, or crushed nuts for a vibrant, textured finish.
Creative Flavor Twists and Toppings to Elevate Your Cheesecake Experience
To make your Deliciously Easy No-Bake Cheesecake Jars You’ll Love truly stand out, try stirring in a swirl of homemade fruit compote-think raspberry or mango-for an inviting burst of color and flavor. Another stunning variation is adding matcha powder to the filling for a delicate green tea note, or folding in chocolate chips for extra indulgence. For toppings, experiment with toasted coconut flakes, crushed pistachios, or a drizzle of raw honey to add a natural sweetness and chewy texture contrast. The versatility of these jars means every batch can be uniquely yours.
Tips for Storing and Serving No-Bake Cheesecake Jars for Maximum Freshness
Store your no-bake cheesecake jars tightly covered in the refrigerator for up to 4 days. For the best creamy texture,avoid freezing as it can affect consistency.When ready to serve, garnish fresh to keep looks crisp and flavors vibrant. Serve chilled in individual mason jars for a charming presentation-easy to transport and perfect for parties or picnics. To further impress guests, pair with a cup of freshly brewed coffee or herbal tea that complements the light tang of cheesecake.Always use clean utensils to maintain freshness and prevent premature spoilage.
Chef’s Notes – Tips for Success
- Softened cream cheese: Ensure the cream cheese is at room temperature to avoid lumps in your filling.
- Whip to perfection: Achieving soft peaks in heavy cream ensures lightness-avoid overwhipping, or it will turn grainy.
- Press the crust firmly: This prevents a crumbly bottom layer and makes scooping easier.
- Make ahead: These jars improve overnight chill time, so prepare a day ahead to enhance flavor meld.
- Allergen swaps: Use gluten-free graham crackers or a nutty crust like almond flour for diet-friendly options.
Serving Suggestions
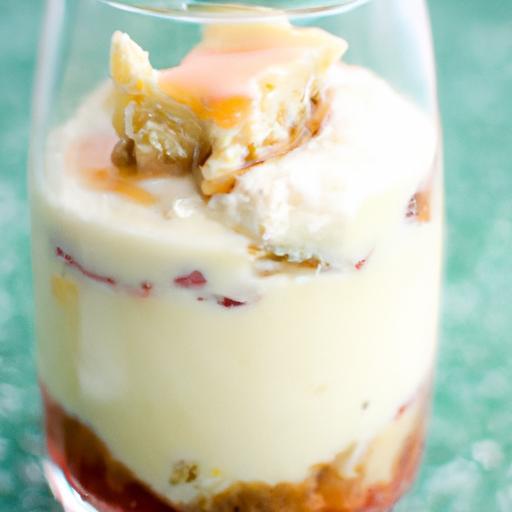
To dazzle visually, layer the jars with alternating components-begin with a thin drizzle of berry sauce over the crust before adding the cheesecake filling. Garnish with mint leaves or edible flowers for a touch of elegance. For gatherings, serve alongside crisp biscotti or shortbread cookies to add an inviting crunch contrast. This dessert pairs beautifully with light, bubbly sparkling water infused with citrus or a chilled glass of non-alcoholic sparkling cider to complement the creamy sweetness.

| Nutrient | Per Serving |
|---|---|
| Calories | 350 |
| Protein | 6g |
| Carbohydrates | 28g |
| Fat | 24g |
For more delightful dessert recipes, check out our Easy Dessert Ideas collection. Explore additional tips and guides at Food Network.
Q&A
Q&A: Deliciously Easy No-Bake Cheesecake Jars You’ll Love
Q: What makes no-bake cheesecake jars different from traditional cheesecakes?
A: No-bake cheesecake jars are a fun and convenient twist on classic cheesecake. Rather of baking a whole cake, these individual servings are assembled in jars and chilled to set. This means less time in the kitchen and no need to worry about oven temperature or bake times-perfect for quick, fuss-free desserts!
Q: What ingredients do I need to make these no-bake cheesecake jars?
A: The basics include cream cheese, heavy cream (or whipped topping), sugar, and vanilla extract for the creamy filling. For the crust, crushed graham crackers with melted butter work beautifully. From there, you can layer in your favorite flavor boosters: fresh berries, chocolate chips, lemon zest, or caramel sauce.
Q: Can I customize these jars with different flavors?
A: Absolutely! These jars are incredibly versatile. Try adding cocoa powder for a chocolate twist, swirl in some fruit preserves, or sprinkle nuts for crunch.You can even create a tropical version using mango chunks and shredded coconut. The possibilities are endless and endlessly delicious.Q: How long does it take for the cheesecake jars to set?
A: After assembling, refrigerate the jars for at least 4 hours, though overnight is ideal. This chilling time lets the filling firm up and flavors meld beautifully. If you’re in a hurry, pop them in the freezer for about an hour to speed up the process, but be sure to thaw slightly before serving.
Q: are no-bake cheesecake jars kid-friendly?
A: Yes! Since there’s no baking involved,kids can safely help with layering and decorating the jars. Plus, the portioned sizes make them perfect for little hands and little appetites. It’s a fun and interactive treat that also teaches basic cooking skills.
Q: How should I store leftover cheesecake jars?
A: Keep them covered tightly in the fridge, and they’ll stay fresh for up to 3 days. Because they’re made in jars with lids, they’re also portable and perfect for picnics or packed lunches. Just remember to keep them chilled until ready to eat.
Q: Can I make these jars vegan or dairy-free?
A: Definitely! swap regular cream cheese for a plant-based alternative,use coconut cream or another thick dairy-free whipped topping,and choose vegan butter or coconut oil for the crust. With a few ingredient swaps,everyone can enjoy these luscious no-bake treats.
Q: What’s the best way to serve these cheesecake jars?
A: Serve them chilled straight from the fridge, topped with fresh fruit, a drizzle of honey or chocolate sauce, or a sprinkle of crushed nuts for texture. The jar presentation is not only charming but also mess-free-each person has their own portion to dig into!
Q: Can these cheesecake jars be frozen for longer storage?
A: Yes, you can freeze them! Make sure the jars are airtight, and freeze for up to a month. Thaw overnight in the fridge before serving to maintain the creamy texture. Keep in mind, some toppings like fresh fruit may not freeze as well, so add those fresh just before serving.
Q: What are some easy garnishes to elevate these cheesecake jars?
A: Think fresh mint leaves,a dusting of cinnamon or cocoa powder,toasted coconut flakes,or finely chopped nuts. Even a tiny edible flower adds a wow factor. Garnishing is the final flourish that makes these simple jars look absolutely gourmet!
In Summary
Whether you’re craving a quick treat or planning to impress guests with minimal fuss, these deliciously easy no-bake cheesecake jars are your new secret weapon. Creamy, customizable, and perfectly portioned, they transform a classic dessert into a hassle-free delight that fits any occasion. So next time you want to whip up something sweet without turning on the oven, reach for these charming jars and enjoy a slice of cheesecake heaven-no baking required!