


There’s something undeniably magical about biting into a piece of crispy duck-its golden, crackling skin giving way to tender, succulent meat beneath. Yet achieving that perfect harmony of crunch and juiciness can feel like an elusive art reserved for master chefs. In “Crispy Duck Unveiled: Secrets to Perfect Golden Crunch,” we peel back the layers of this culinary mystery to reveal the time-honored techniques, precise temperatures, and little-known tips that transform ordinary duck into a show-stopping centerpiece. Whether you’re a seasoned cook or an adventurous home chef, prepare to unlock the secrets behind that irresistible, shatteringly crisp skin that makes every bite a festivity.
Crispy Duck Unveiled: Secrets to Perfect Golden Crunch
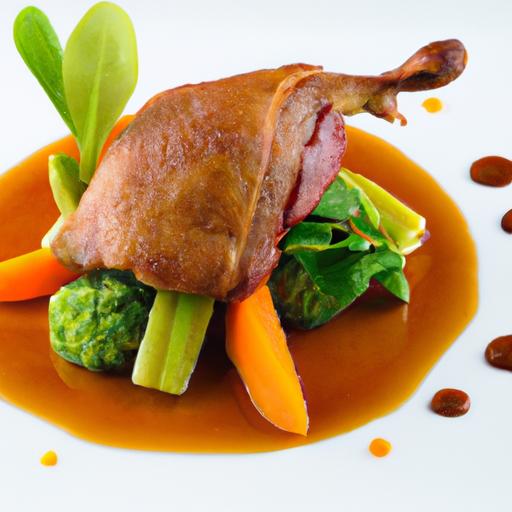
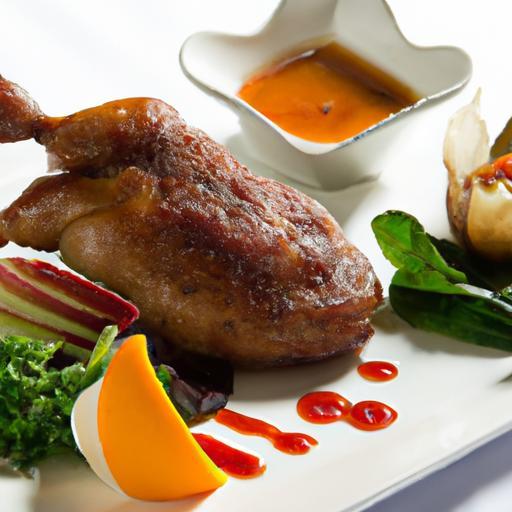
Crispy duck unveiled offers an irresistible combination of crackling skin and tender, juicy meat-a harmony that has captivated food lovers from Beijing banquet halls to modern home kitchens.This transformative recipe will guide you through selecting the ideal duck, preparing its skin to achieve maximum crunch, and mastering key cooking techniques to lock in rich flavors, topped off with an exquisite glaze that elevates every bite.
Prep and Cook Time
- Planning: 30 minutes
- marinating (optional): 2 hours
- Cooking: 1 hour 15 minutes
- Total Time: approximately 3 hours
Yield
Serves 4 hearty portions
Difficulty Level
medium – perfect for enthusiastic home cooks ready to elevate their poultry skills
Ingredients
- 1 whole duck (about 5-6 lbs), preferably fresh and well-chilled
- 2 tbsp sea salt (for skin drying)
- 1 tbsp baking soda (aids in skin crisping)
- 4 cups boiling water (to rinse the skin)
- 2 tbsp honey (for glazing)
- 2 tbsp soy sauce (use gluten-free if preferred)
- 1 tbsp toasted sesame oil
- 1 tsp five-spice powder
- Freshly ground black pepper, to taste
- 2 star anise pods (optional, for aromatics)
- 3 cloves garlic, smashed
- 1 thumb-sized piece of ginger, sliced
Instructions
- Select your duck carefully. Choose a fresh, plump bird with firm skin; its natural fat layer is key to ultimate crispiness. Rinse and pat dry thoroughly.
- Prepare the skin for crispness. Gently separate the skin from the flesh where possible. Mix the sea salt and baking soda. Rub this combination all over the duck’s skin to dry out moisture and aid in browning. let it rest uncovered in the refrigerator for at least 2 hours, preferably overnight.
- rinse with boiling water. Pour the boiling water evenly over the duck to tighten the skin, then pat dry again entirely. This step tightens the pores and creates the foundation for crackling skin.
- Season the duck internally. Combine garlic, sliced ginger, star anise, five-spice powder, and black pepper. Stuff this aromatic blend into the cavity for deep flavor.
- Preheat your oven. Set it to 375°F (190°C). If using a roasting rack, place the duck breast-side up to ensure even heat circulation.
- Roast the duck slowly. Start cooking for 45 minutes. Then increase the temperature to 425°F (220°C) for the last 20-30 minutes. This high heat burst crisps the skin beautifully. Occasionally baste with rendered fat to enhance golden tones.
- Prepare the glaze. Mix honey, soy sauce, and toasted sesame oil. During the last 10 minutes of roasting, brush the glaze generously over the duck’s skin. The sugars caramelize gently, giving a luscious sheen and layered taste.
- Rest before carving. Let the duck rest 10-15 minutes after removal to allow juices to redistribute, guaranteeing moistness beneath the crispy crust.
Chef’s Notes
- The drying process is essential; do not skip chilling the salted duck uncovered to ensure the skin dries out fully.
- For an even crispier finish, after the initial roasting phase, you can briefly broil the skin while watching carefully to avoid burning.
- If unable to find whole duck, duck breasts with skin on can be treated similarly but require shorter cooking times.
- Resting the duck is critical – remember it continues to cook and the juices settle for a juicy bite.
- Store any leftovers in an airtight container and refresh skin crispiness by reheating uncovered in a 400°F oven for 10 minutes.
Serving Suggestions
Crispy duck unveiled shines best alongside fresh cucumber ribbons and scallions, paired with a side of steamed jasmine rice or delicate pancakes for wrapping. Garnish with finely chopped cilantro and a sprinkle of toasted sesame seeds to add visual contrast and bursts of flavor. Accompany the dish with a simple plum sauce or hoisin reduction to complement the golden skin’s sweet-savory notes. For an elegant touch, serve with lightly sautéed bok choy or tender snap peas.

| Nutrient | per Serving |
|---|---|
| calories | 480 kcal |
| Protein | 35 g |
| Carbohydrates | 4 g |
| Fat | 36 g |
For more techniques on roasting poultry to perfection, explore our guide on roasting chicken. To deepen your understanding of the science behind skin crispiness, check this insightful article from Serious Eats.
Q&A
Q: What is the secret to achieving that iconic golden crisp on duck skin?
A: The magic lies in rendering out the fat beneath the skin slowly and thoroughly. Start by patting the duck dry, then prick the skin carefully without piercing the meat. This allows the fat to escape during cooking, letting the skin crisp up beautifully without burning. Low and slow heat at first, followed by a blast of high heat, creates that perfect golden crunch.
Q: Why is drying the duck skin so important before cooking?
A: Moisture is the enemy of crispiness! Any water left on the skin will steam the duck rather than roast it, leaving you with soggy, rubbery skin.For the crispiest results, make sure the duck is thoroughly dried-pat it with paper towels and even let it air dry in the fridge for a few hours or overnight if time allows.
Q: Can I use a marinade or rub without compromising the crispy skin?
A: Absolutely! The key is to keep the skin dry while adding flavor. Apply dry rubs sparingly or season underneath the skin if you want to infuse taste without wetting the surface. Marinades with heavy liquids, however, can add moisture and prevent crisping, so it’s better to reserve those for the meat side or as a finishing sauce.
Q: What cooking methods best maximize the crispiness of duck skin?
A: Pan-searing followed by oven-roasting is a classic combo. Begin skin-side down on medium heat to render fat steadily, then finish in a hot oven to crisp and color the skin evenly. Alternatively, slow roasting at a low temperature then broiling briefly can also deliver a stunning crunch.
Q: How do I know when the duck skin is perfectly crispy without drying out the meat?
A: Listen to the sound and watch the texture! Crispy duck skin crackles and has a firm, golden-brown surface. The meat underneath should remain juicy and tender. Using a meat thermometer to hit an internal temperature around 135-140°F (57-60°C) ensures the meat is cooked but still succulent, while the skin is at its peak.
Q: Are there any tips to render duck fat for cooking while getting crispy skin?
A: Yes! Place the duck skin-side down in a cold pan and gradually increase the heat. This gentle rendering lets fat melt out before the skin crisps up.Collect this rich duck fat-it’s liquid gold for roasting vegetables or frying eggs, adding layers of luscious flavor.
Q: Can I achieve crispy duck skin using an air fryer or other modern kitchen gadgets?
A: Definitely! air fryers are brilliant at circulating hot air, which dries and crisps the skin wonderfully. Just ensure the duck is dry, and monitor closely to prevent overcooking. Adjust cooking times based on the size of your duck pieces for evenly golden results.
Q: What role does resting the duck after cooking play in maintaining crispiness?
A: Resting allows the juices to redistribute for juicy meat, but don’t cover the duck tightly. Tent it loosely with foil or leave it uncovered briefly so the steam doesn’t soften the skin. A dry surface means crunchier bites right to the last forkful.Q: Are whole ducks better for crispy skin, or can duck breasts achieve the same effect?
A: Both work beautifully! Whole ducks require more patience for even rendering and crisping, while duck breasts cook faster and allow focused attention on skin perfection.Nonetheless of cut, the technique of drying, slow fat rendering, and finishing with high heat holds true.
Q: What’s a foolproof final technique to ensure maximum crunch before serving?
A: Just before plating, give the skin a fast broil or blast of high heat to revive and enhance the crispiness. this final touch reactivates caramelization and snap, delivering that irresistible golden crunch every time.
Insights and Conclusions
As the final bite of crispy duck melts away, it’s clear that achieving that perfect golden crunch is both an art and a science-one that combines careful preparation, precise cooking, and a touch of culinary passion. Whether you’re a seasoned chef or a curious home cook, these unveiled secrets invite you to embark on a flavorful journey where each crackle and crisp tells a story of mastery. So, next time you crave that irresistible texture and rich, succulent flavor, remember: the perfect crispy duck is never just luck-it’s a deliciously crafted experience waiting to be savored.