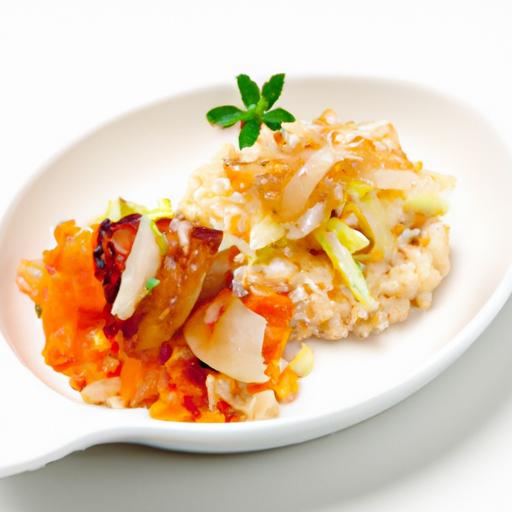


There’s something undeniably satisfying about the crackle of perfectly crispy rice-the golden crust that forms at the bottom of a pot or pan, promising a textural contrast that elevates every bite.Whether cherished as the prized finale of a homemade stir-fry, or the star of a comforting bowl of bibimbap, mastering the art of crispy rice is a culinary skill that transforms everyday grains into a crunchy delight.In this step-by-step guide, we’ll unravel the secrets behind achieving that coveted crunch, exploring techniques, tips, and tricks to help you create irresistibly crispy rice every time. Get ready to turn simple rice into a masterpiece of texture and flavor.
Choosing the Perfect Rice for Ultimate Crispiness
Mastering the Art of Crispy Rice begins with understanding the rice itself-its variety, texture, and cooking behavior all play pivotal roles in achieving that irresistible golden crunch. Long-grain rice varieties like Jasmine or Basmati offer fluffy, separate grains but might lack the ideal binding needed for forming a crisp crust. for the quintessential crispy rice, medium-grain or short-grain rice, such as Japanese Calrose or sushi rice, excel as of their higher starch content, which helps the grains cling together without becoming mushy.
rinse the rice thoroughly until the water runs clear to remove excess surface starch that can cause gummy results.Yet, some residual starch is desirable to encourage the characteristic cohesion for crispiness. Using slightly cooled, day-old cooked rice is another secret-it allows excess moisture to evaporate, reducing sogginess and preparing the grains for an even, crunchy sear.
Techniques to Achieve the Ideal Crispy Texture
Perfecting crispy rice requires precise technique beyond simply selecting the right grain. After cooking, spread the rice thinly on a baking sheet to cool off and firm up. when ready, heat a well-oiled non-stick skillet over medium-high heat, ensuring the fat is hot but not smoking. Press the rice firmly into the pan in an even layer – this compactness is essential for a uniform crust.
Resist stirring too soon. Allow the rice to cook undisturbed for at least 5 to 7 minutes so the bottom forms that golden, crackling texture. Flip in sections or invert onto a plate if you want double-sided crispiness. For extra flavor, incorporate aromatics like toasted sesame oil or a light baste of soy sauce during cooking to deepen the crust’s complexity.
Seasoning and Flavor Pairings to Elevate Your Crispy Rice
Seasoning your crispy rice elevates the humble grain into a star of the plate. Traditionally, a light sprinkling of salt and freshly ground black pepper at the end enhances texture without overwhelming. For an umami kick, drizzle toasted sesame oil or a splash of tamari. Fresh herbs such as finely chopped scallions, cilantro, or even a hint of grated ginger bring brightness.
Pair your crispy rice with vibrant toppings-sautéed mushrooms, caramelized onions, or crisp-edged tofu cubes add layers of flavor and texture contrast. If you’re feeling adventurous, a touch of chili flakes or lime zest can brighten and balance the richness beautifully.
Troubleshooting Common Issues for Consistently Perfect Results
even with the right rice and technique, occasional hiccups happen. If your rice turns out soggy, it’s likely due to excess moisture-drain cooked rice well, use day-old chilled rice, and avoid overcrowding the pan. A pan that isn’t hot enough will also prevent crisping; preheat thoroughly and add oil just before the rice to prevent sticking.
For uneven browning, spread the rice in a uniform thickness and press down gently. avoid stirring too early-patience is key. Sticking can be combated by using a non-stick skillet and careful temperature control. Keep a spatula handy for gentle loosening as needed.
With each attempt, you’ll sharpen your instinct for heat, texture, and seasoning balance, bringing you closer to mastery of crispy rice every time.
Prep and Cook Time
- Prep Time: 10 minutes
- Cook Time: 15 minutes
- Total Time: 25 minutes
Yield
Serves 2-3 as a side dish or snack
Difficulty Level
Medium - Requires attention to detail and timing
Ingredients
- 2 cups cooked medium-grain rice (preferably day-old, chilled)
- 2 tbsp neutral oil (e.g., vegetable or canola oil)
- 1 tsp toasted sesame oil
- ½ tsp sea salt, or to taste
- Freshly ground black pepper, to taste
- 1 tbsp finely chopped scallions (optional)
- Optional flavor boosts: soy sauce or tamari for basting, chili flakes or lime zest for garnish
Instructions
- Prepare the rice: If using fresh cooked rice, rinse and dry thoroughly.Ideally, use day-old rice refrigerated overnight for best texture.
- Heat the pan: Place a non-stick skillet over medium-high heat.Add the neutral oil and allow it to heat until shimmering but not smoking.
- Form the crust: Add the rice to the pan in an even layer, pressing down firmly with the back of a spatula or a flat-bottomed lid to compact the grains for 1-2 minutes.
- Cook undisturbed: Let the rice cook without stirring for 5 to 7 minutes until the bottom turns golden brown and crisp.
- Flip or scoop: To get a double-sided crust,carefully divide the rice into manageable sections. Flip each section to crisp the other side for an additional 3-5 minutes. Alternatively, invert the rice onto a plate and slide it back into the pan to crisp the other side.
- Season and finish: drizzle the toasted sesame oil over the rice, sprinkle with salt and pepper, and optionally baste lightly with soy sauce. Toss in scallions or your chosen garnishes.
- Serve promptly: Transfer crispy rice to a warmed plate and garnish with fresh herbs or chili flakes. Enjoy while the crunch is at its peak.
tips for Success
- Use day-old rice to minimize moisture and maximize crispiness.
- Ensure the pan and oil are sufficiently hot before adding rice to avoid sticking.
- Avoid overcrowding; cook rice in batches if needed.
- If flipping is tricky, use a wide spatula or invert rice onto a plate first for ease.
- Customize seasoning by adding aromatic oils or fresh herbs, but keep it balanced to let the crispy texture shine.
- Make ahead: crisp the rice and keep warm in a low oven for up to 20 minutes without losing texture.
Serving Suggestions
Crispy rice shines as a base for vibrant bowls or as a crunchy side. serve topped with stir-fried vegetables, ripe avocado slices, or seared tofu for a wholesome meal. garnish with toasted sesame seeds, microgreens, or a sprinkle of furikake to enhance the sensory experience.
Pair with dipping sauces like soy-ginger or a zesty lime-cilantro dressing for contrast. For a snack, cut the crispy rice into wedges and enjoy with a drizzle of spicy mayo or tamari glaze.

| Nutrient | Per Serving |
|---|---|
| Calories | 220 kcal |
| Protein | 4 g |
| Carbohydrates | 45 g |
| Fat | 5 g |
For deeper insights on rice varieties and starch content in cooking, visit the Cook’s Illustrated rice guide.
Looking to explore more rice-based dishes? Check out our article on Fluffy Fried Rice: The Ultimate Guide for explosions of flavor with crispy rice in every bite.
Q&A
mastering the Art of Crispy Rice: A Step-by-step Guide – Q&A
Q: What exactly is crispy rice,and why is it so beloved in various cuisines?
A: Crispy rice is rice that’s been cooked and then intentionally crisped up to develop a golden,crunchy crust while retaining a tender interior. It’s a texture phenomenon-comforting yet exciting-that adds depth to dishes like Korean bibimbap, Persian tahdig, or simple stir-fries. The contrast between the delicate fluffiness and the satisfying crunch makes it irresistible.
Q: What type of rice should I use to achieve the perfect crispiness?
A: Medium- to short-grain rice varieties are your best friends here. Their natural starchiness helps grains cling together, forming the cohesive crust you desire. Jasmine or basmati rice are lovely for fluffiness but might not crisp as uniformly. Sushi rice or Calrose are great versatile options, offering that winning balance of stickiness and texture.
Q: How do I prepare the rice before attempting to crisp it?
A: Start with properly cooked rice-ideally a little overcooked so it’s sticky but not mushy. Let it cool slightly; day-old rice from the fridge works beautifully because it’s dryer and less likely to clump unpredictably. When ready, fluff it up gently, breaking up any hardened lumps to ensure even crisping.
Q: What cooking oils work best for crisping rice?
A: Neutral oils with high smoke points, such as vegetable oil, canola oil, or grapeseed oil, are excellent choices. They allow the rice to sizzle and brown without burning. For a subtle nutty aroma, a light drizzle of toasted sesame oil added toward the end can elevate the flavor without overwhelming the crisp.
Q: What’s the technique for creating that enviable crispy layer?
A: The key is gentle but steady heat and patience. Use a non-stick skillet or cast-iron pan, heat your oil until shimmering, then spread the rice evenly into a thin layer. Press down lightly with the back of a spatula for maximum surface contact. Cook undisturbed on medium-low heat to form a crust, then carefully flip or divide to serve with crispiness intact.
Q: can I add flavors or ingredients to the rice before crisping it?
A: Absolutely! Mixing in finely chopped scallions, sesame seeds, toasted spices, or even a touch of soy sauce can infuse the rice with character. Just be mindful of added moisture-excess liquid can hinder crisping. Pat ingredients dry if needed and incorporate them sparingly for the best texture.
Q: How do I flip or serve crispy rice without breaking the crust?
A: Confidence and a wide spatula are your allies. Slide a thin spatula under the crust gently. If flipping whole feels risky, you can break the rice into sections or serve it crust-side up to showcase the golden texture. Some chefs prefer to invert the skillet onto a plate and then slide the rice back into the pan to crisp the other side.
Q: Are there any common pitfalls to avoid when making crispy rice?
A: Yes! avoid high heat, which can burn the rice before it crisps properly. Don’t stir or press too much early on-disturbing the rice prevents that uniform crust. Also, be cautious with oil amount; too little, and the rice won’t crisp evenly, too much, and it can become greasy.
Q: How can I incorporate crispy rice into meals beyond the typical side dish?
A: Crispy rice thrives as a texture contrast in bowls, salads, and even as a crunchy bed for roasted vegetables or eggs. Sprinkle it on top of soups or stews for crunch bursts or use it as a base layer beneath flavorful sauces. Creativity with crispy rice can transform simple meals into textural adventures!
Q: Can I store leftover crispy rice and reheat it while maintaining crunch?
A: Yes, store leftovers in an airtight container to keep moisture at bay. When reheating, skip the microwave; rather, toast it gently in a dry skillet over medium heat. This method revives the crisp and prevents sogginess, almost like bringing your rice back to life with a delicious crunch.
With these insights and techniques, you’re well on your way to crafting irresistible crispy rice-a delightful canvas of texture and flavor that will elevate your culinary creations. Happy crisping!
Closing remarks
Whether you’re aiming to elevate a humble bowl of rice or add a satisfying crunch to your favorite dishes, mastering the art of crispy rice opens a world of culinary possibilities.With patience, the right technique, and a touch of creativity, you can transform simple grains into golden treasures that delight both the eyes and the palate. So next time you hear that irresistible sizzle,remember-perfectly crispy rice isn’t just a side dish,it’s a skill worth savoring. Ready to crisp,crackle,and conquer? Your crispy rice journey starts now.